Sesh app for Webex
At Sesh, we believe better meetings lead to a better day at work. With Sesh integrated right into Webex, you’ll be able stay on track, engage everyone, and get more done.
Opening the Sesh app for Webex
You'll need a free or paid Webex account to install the app. The app may be disabled by your organization. Contact your Control Hub administrator to enable the app.
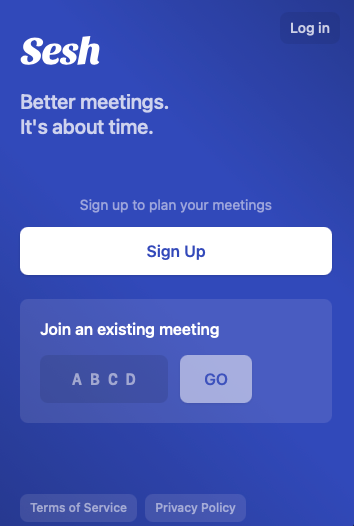
If you don’t have a Sesh account, don’t worry! You can still join an existing Sesh by entering a 4-letter code generated by your meeting host or having your host click the Share to Webex button once inside a meeting. If you'd like to create and plan your own Sesh meeting, you’ll be directed to a sign up screen where you can create an account once you open the app.
Once you're inside a Webex meeting, click the Apps button in the lower-right of the meeting window, beside Participants and Chat.
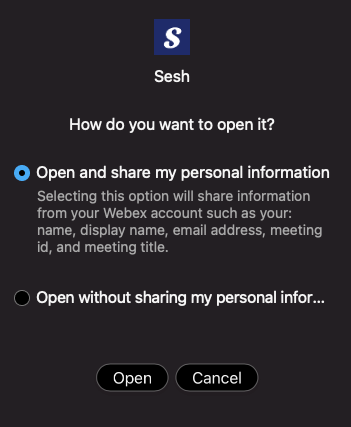
You may choose to open the Sesh app with or without sharing your personal information.
Sign up or log in to your Sesh account to start planning a meeting. Or join an existing Sesh as a guest through a 4-letter code generated by your meeting host.
Usage
After signing up or logging into your Sesh account, you’ll be able to use Sesh’s interactive agenda, activities, and outcomes directly within the Webex window.
Plan your meeting
Setting up your meeting: First, create a new meeting (a Sesh) with the Plan new meeting button. Type in your name and click Set name to get started.
Structure your meeting: Pick an agenda template from the left sidebar, or make your own by clicking the plus sign. The agenda will populate with suggested, designed, interactive agenda items (activities), from the template you selected. Click on an activity in the left sidebar to edit details, like name and timing.
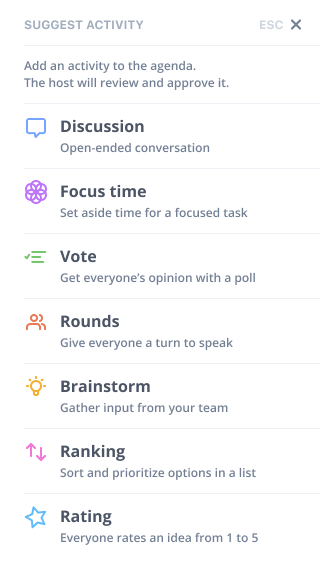
To add new activities, like Votes, Icebreakers, Brainstorms, and Rounds—a quick round robin for all participants—click the big + to further customize your agenda.
If you want to change key details about your meeting, like the title or meeting duration, use the gear-shaped Settings button in the top right-hand corner.
The right hand panel in fullscreen version (or the Outcomes button when Webex is open) helps you and your meeting participants stay organized. Add in your meeting goal, any relevant links to documents and files, and your Webex or other video conferencing link.
Now that your meeting is planned, you can add your Sesh link to your calendar invite. Simply copy/paste the link.
Run / During your meeting
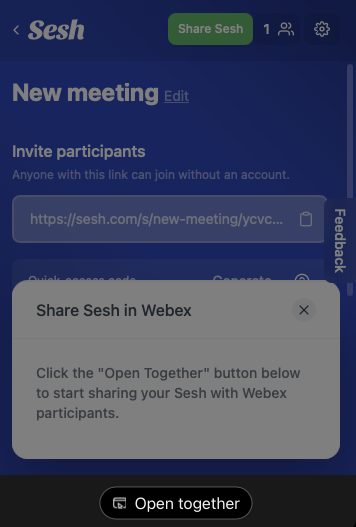
Invite your Webex participants into the Sesh app by pressing the green Share to Webex button on the top right of the app, which will trigger an Open Together option to display on the bottom of the app window. If this button is not visible, make sure you are host of both the Sesh and Webex meeting. Once you click the Open Together button, your Webex participants will be prompted to open Sesh and then taken right into the meeting.
Once everyone’s in the Sesh, begin the meeting by clicking Start meeting in the top right-hand corner.
As your first activity starts, you’ll notice the white line keeping time on your agenda.
If you’re running out of time and want more, press +5 minutes (near the end of an activity). When you’re ready to move on, click Next activity.
You can also add new activities in real time by clicking + Add new activity. Add and edit your new activity and it will be dynamically added to the agenda. Drag and drop it within your agenda.
After your meeting
To end the meeting, hit the large End meeting button.
You’ll see a summary of your meeting—outcomes, meeting stats, and Talk Time breakdown. The meeting summary will also be emailed out to your participants.
If this is a recurring meeting, reuse your agenda again by clicking the Repeat this meeting button.
Congrats on running your first meeting with Sesh!
Extras
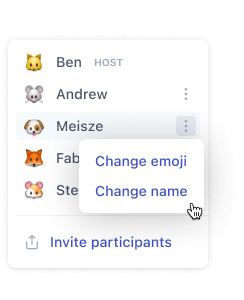
Change your name or avatar: Each participant is assigned their name and a random emoji as they join the Sesh. To either, click on the Setting Gear and scroll to the Participants section. Click on the vertical dots to access a menu to change either.
Activities: Sesh includes several ready-made activities because we know that each meeting requires different types of engagement. Add activities that best fit your meeting’s goals, but don’t forget to experiment as well.
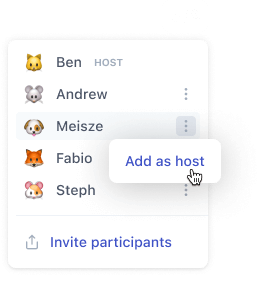
Adding additional hosts: Meetings hosts can add additional hosts to the Sesh. To make a participant a host, click on the Setting Gear and scroll to the Participants section. Click on the vertical dots next to the participant you’d like to make a host, and you’ll be able add them as a host.
Contact support
If you have any questions or need help, don't hesitate to contact our support team.
The interactive agenda that keeps your meetings on track and on time.
© 2026 Longform Technology, Inc.
All rights reserved.
Activities